How to Configure a PXE Server in CentOS/RHEL 7
The Preboot Execution Environment (PXE) is an industry-standard client/server interface that allows networked computers that are not yet loaded with an operating system to be configured and booted remotely by an administrator. Let us work on CentOS/RHEL 7 to configure a PXE Server to boot and install CentOS/RHEL 7 OS in the client configuration. First setup Static IP Address for PXE server, this is important. you can edit the network configuration file or use nmcli command to setup. For setting up the static IP address click here to know more.

Check the details with nmcli command more information about the Network settings.
# nmcli con show eno16777736

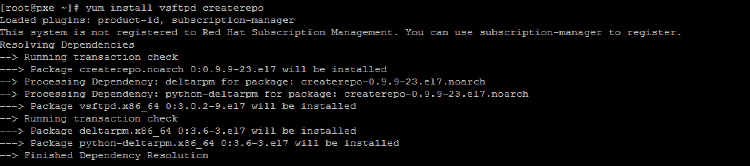
Install vsftpd and createrepo packages into the server using YUM. this is to configure the software repo.
# yum install vsftpd createrepo
Mount the RHEL 7 DVD in the server to copy the packages required to configure software repo.
# mount -t iso9660 /dev/sr0 /mnt

Create a directory /rhel7/dvd/ under /var/ftp/pub to hold the dvd packages and copy the DVD contents to this directory.
# mkdir -p /var/ftp/pub/rhel7/dvd/
# cp -rv /mnt/* /var/ftp/pub/rhel7/dvd/

Create yum client configuration file under /etc/yum.repos.d. Enter the following details.

For running group commands like grouplist, groupinstall we need to copy *-comps-Server.x86_64.xml and using this file we need to update the metadata again using the following commands.
# cd /var/ftp/pub/rhel7/dvd/repodata/
# cp 76a190afa1c59e14d3a03f9b03c3eee31df0099f1193528ebb87d4d493d2b686-comps-Server.x86_64.xml /var/ftp/pub/rhel7/dvd/group-comps-Server.x86_64.xml
# createrepo -vg /var/ftp/pub/rhel7/dvd/group-comps-Server.x86_64.xml /var/ftp/pub/rhel7/dvd/


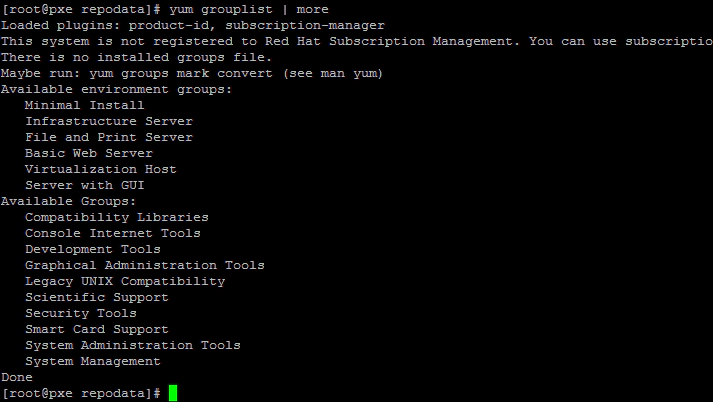
Test the yum configuration and yum group file settings using yum grouplist command.
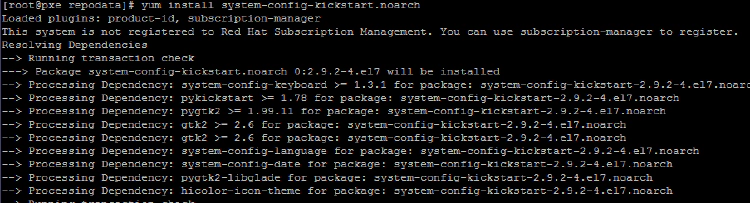
Now install the Kickstart packages using YUM for configuring the kickstart input file.
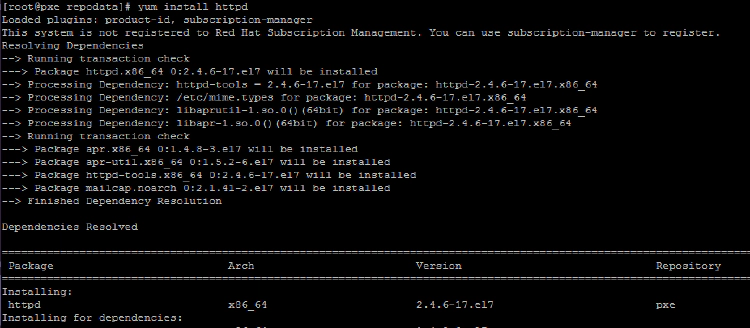
Install Apache software into this server using YUM.
# yum install httpd
Now create a soft link of /var/ftp/pub into /var/www/html directory so that you can access this repository and installation tree using FTP or HTTP Protocol.
# ln -s /var/ftp/pub/ /var/www/html/
Update the SELINUX context for these directory using restorecon command.
# restorecon -Rv /var/ftp/pub/
# restorecon -Rv /var/www/html/
Start the service for vsftpd and httpd using following commands.
# systemctl start vsftpd
# systemctl start httpd
# systemctl enable vsftpd
# systemctl enable httpd

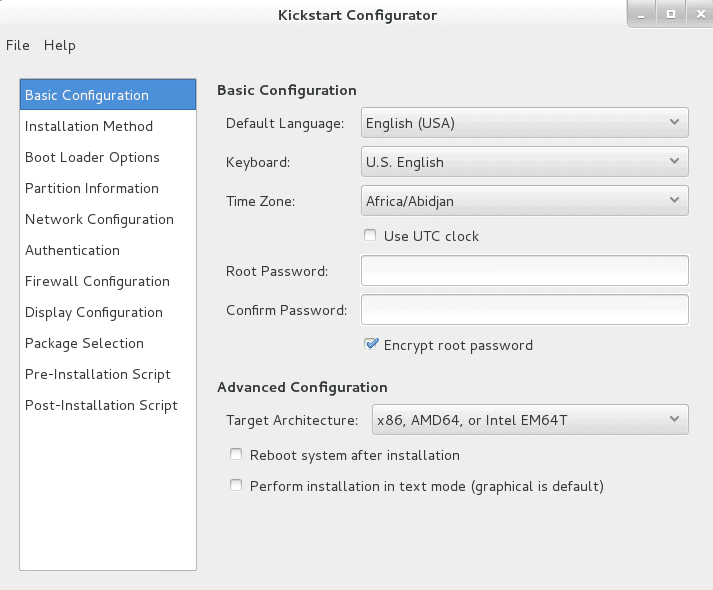
Now create a kickstart file for unattended installation of CentOS/RHEL 7 OS. to create kickstart unattended file run “system-config-kickstart utility. Now you could see a window similar to the below. provide the required information and save it under /var/ftp/pub directory.
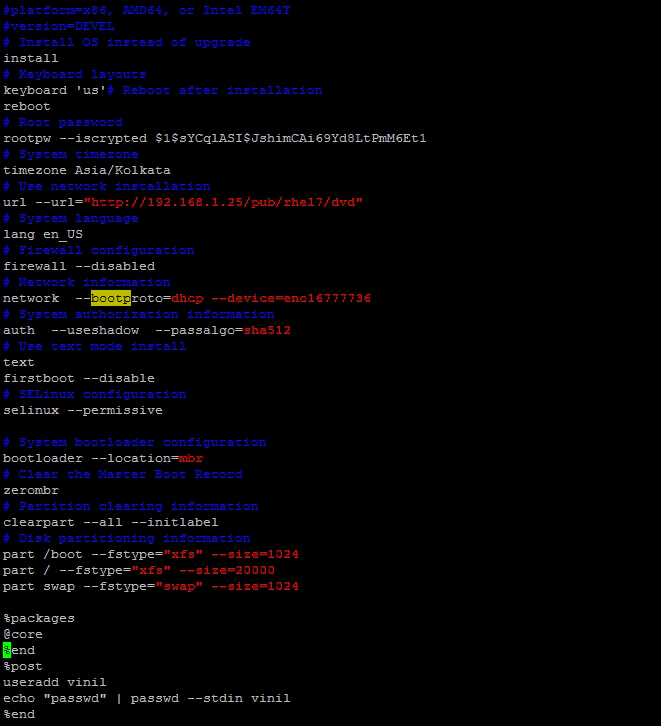
Another way to create kickstart file to copy the /root/anaconda-ks.cfg file to /var/ftp/pub and edit according to your requirement. Here is my kickstart file.
Now restart the vsftp and httpd services.
# systemctl restart vsftpd
# systemctl restart httpd

Check whether you are able to access the ks.cfg using http. use firefox or links to check it.
# links http://192.168.1.25/pub/ks.cfg
If it’s successful then you will get this screen.
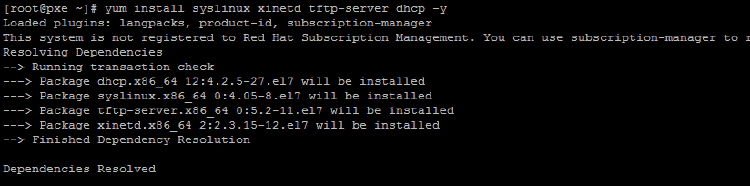
Now we need to install the packages for PXE boot. Install syslinux, xinetd, tftp-server, and DHCP using YUM.
# yum install syslinux xinetd tftp-server dhcp -y
Create a directory pxe configuration directory named “pxelinux.cfg” in /var/lib/tftpboot.
# mkdir /var/lib/tftpboot/pxelinux.cfg

Now copy the “/usr/share/syslinux/pxelinux.0” to “/var/lib/tftpboot” directory.
# cp /usr/share/syslinux/pxelinux.0 /var/lib/tftpboot/

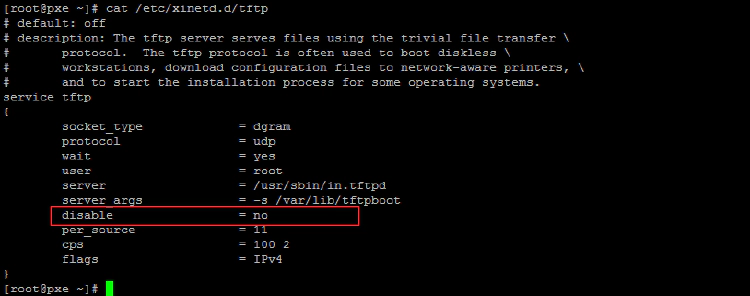
Enable tftp service. edit the /etc/xinetd.d/tftp file and enable the xinetd configuration. This is used to provide pxe kernel to client.
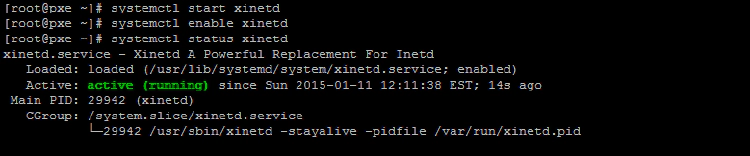
Start and enable tftp server (xinetd) service. Run the following commands.
# systemctl start xinetd
# systemctl enable xinetd
Now configure DHCP service. This is used to give the IP address to clients. To configure DHCP copy the sample configuration from /usr/share/doc/dhcp-4.2.5/dhcpd.conf.example to /etc/dhcp/dhcpd.conf.
# cp /usr/share/doc/dhcp-4.2.5/dhcpd.conf.example /etc/dhcp/dhcpd.conf

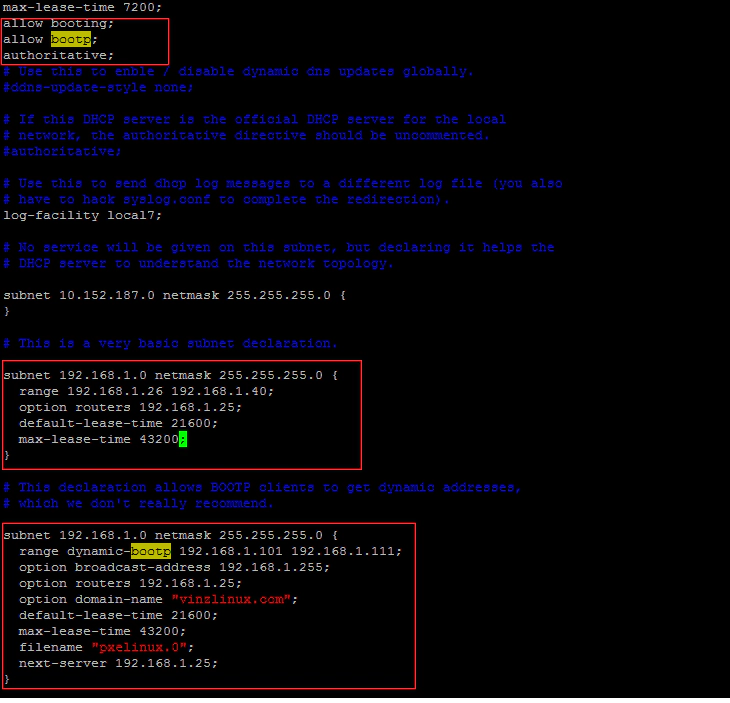
Now edit the configuration file /etc/dhcp/dhcpd.conf and add the following lines.
allow booting;
allow bootp;
authoritative;

# This is a very basic subnet declaration.

subnet 192.168.1.0 netmask 255.255.255.0 {
  range 192.168.1.26 192.168.1.40;
  option routers 192.168.1.25;
  default-lease-time 21600;
  max-lease-time 43200;
}

# This declaration allows BOOTP clients to get dynamic addresses,
# which we don't really recommend.

subnet 192.168.1.0 netmask 255.255.255.0 {
  range dynamic-bootp 192.168.1.101 192.168.1.111;
  option broadcast-address 192.168.1.255;
  option routers 192.168.1.25;
  option domain-name "vinzlinux.com";
  default-lease-time 21600;
  max-lease-time 43200;
  filename "pxelinux.0";
  next-server 192.168.1.25;
}
Restart the dhcpd service and enabled it using the following command.
# systemctl restart dhcpd
# systemctl enable dhcpd

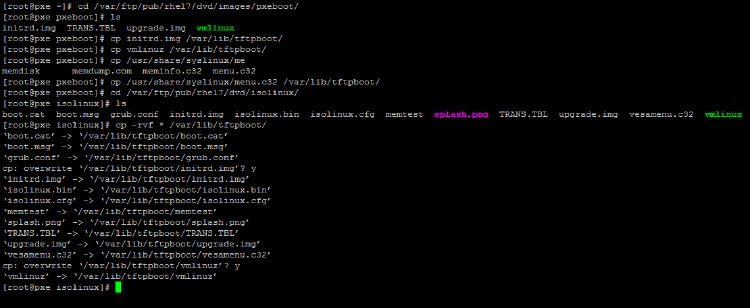
Now copy the following files from CentOS/RHEL 7 to /var/lib/tftpboot/ for creating the PXE server.
# cd /var/ftp/pub/rhel7/dvd/images/pxeboot/
# cp initrd.img /var/lib/tftpboot/
# cp vmlinuz /var/lib/tftpboot/
# cp /usr/share/syslinux/menu.c32 /var/lib/tftpboot/
# cd /var/ftp/pub/rhel7/dvd/isolinux/
# cp -rvf * /var/lib/tftpboot/
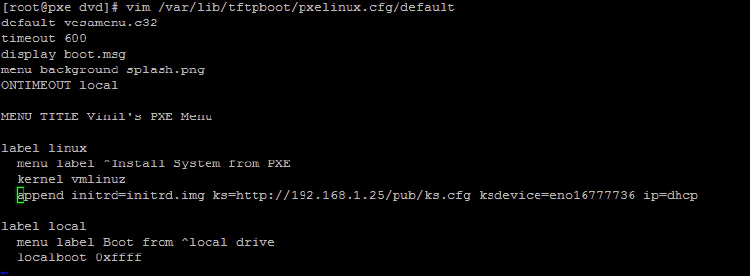
Now create a PXE boot menu. create a file named “default” under /var/lib/tftpboot/pxelinux.cfg directory. and add the following lines.
default vesamenu.c32
timeout 600
display boot.msg
menu background splash.png
ONTIMEOUT local

MENU TITLE Vinil's PXE Menu

label linux
  menu label ^Install System from PXE
  kernel vmlinuz
  append initrd=initrd.img ks=http://192.168.1.25/pub/ks.cfg ksdevice=eno16777736 ip=dhcp

label local
  menu label Boot from ^local drive
  localboot 0xffff
Now restart the vsftpd and httpd service and not boot the client and check the configuration. You could see a below screen in the PXE client machine.
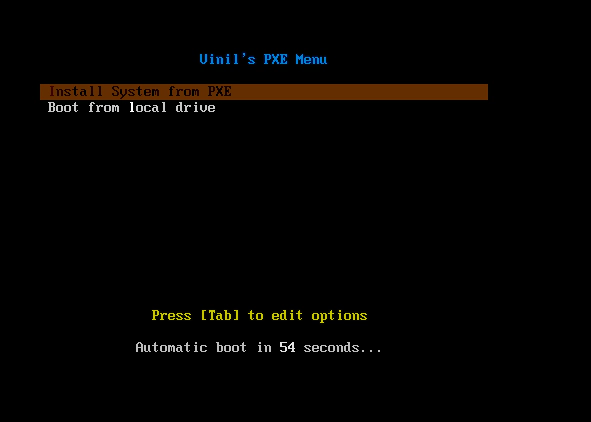
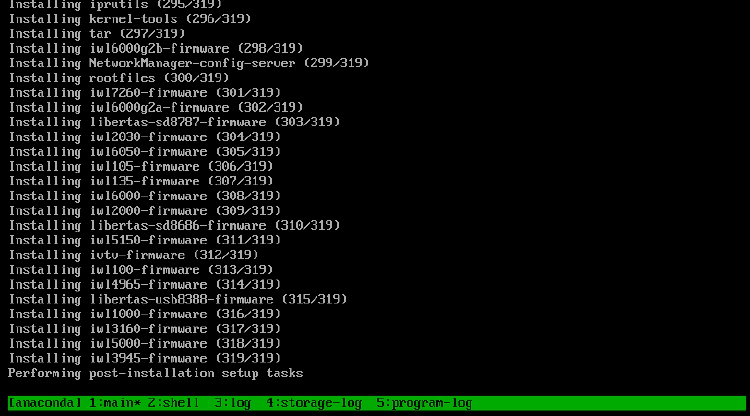
Select it and you would see that it starts installing the RHEL7.0 os on the client.
That’s all about the PXE server configuration. I hope you found this useful.